Making of "Trying To Hold It Together" CNC halftone piece

"Trying To Hold It Together"2017 (click for large view)
This piece is one of my personal favorites, and probably the one that gets the most comments from people who see it in person. It was sold in 2019 to a collector. The process to complete it was quite long so I thought some of you would find it interesting to see all the steps that went into it. Feel free to leave any questions or comments below! The whole thing started with this simple little sketch that I did with a china marker, only a couple inches wide back in 2014.

I scanned this in and scaled it up and used Krita (an awesome paint program) to paint on it to create the following gray scale image:

Then I had to figure out how to halftone it. Click here to see a gallery of GIFs representing all my attempts over the course of two years. Eventually, my software matured to a point where I felt I had something worthy of the image, which is the final GIF in the gallery. If you look, you can see that my underlying painting was also maturing over time.
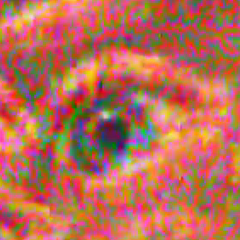
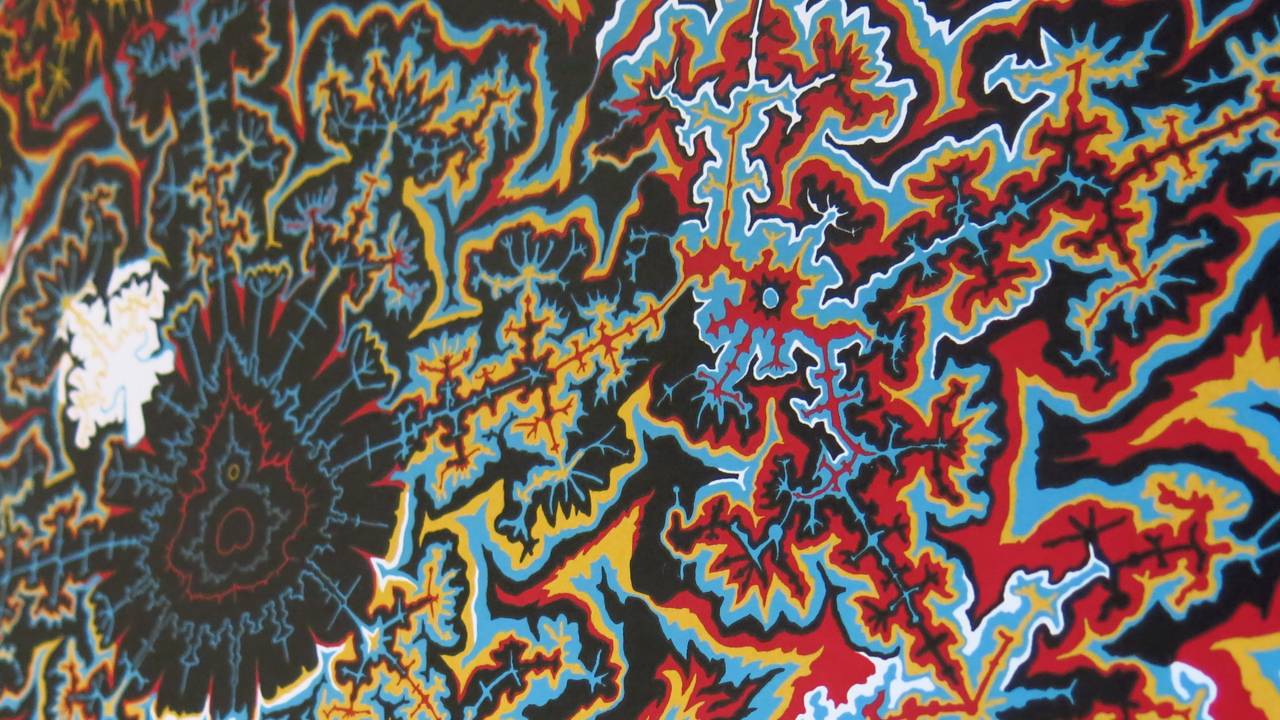
For the final halftone I used an implementation I wrote of a fractal algorithm known as Diffusion Limited Aggregation (DLA). Frost on the window is a common example, but the original experiment involved an electrode in a solution of metal ions. There are two parts to the simulation: there is a structure that is forming known as the aggregate, and there are small particles diffusing around it which will stick to the aggregate if they touch it. As more particles stick, the aggregate grows. No two DLA simulations are ever the same, and there are many ways to influence their shape. Notice in the video below that the boundaries are periodic, so as the growth goes off one edge it appears on the other. For this piece, I used the eyes as the seeds and I painted the weight image so that the growth would pour down the cheeks and curl around the noses, and also quickly spread up the forehead and loop around to the chin, where it meets the rest of the growth in a crease that matches the mouth. This level of artistic control is not possible with many other fractal types, such as the Mandelbrot set which is amazing looking but always the same and difficult to wrangle to fit a particular image.


For the final image I created this fractal gradient at a large resolution with thousands of pixels on each side. The final gradient looks remarkably similar to elevation data of mountain ranges. In fact, I'm pretty sure this would be a valid method for artificial terrain generation, but that's a whole other topic.

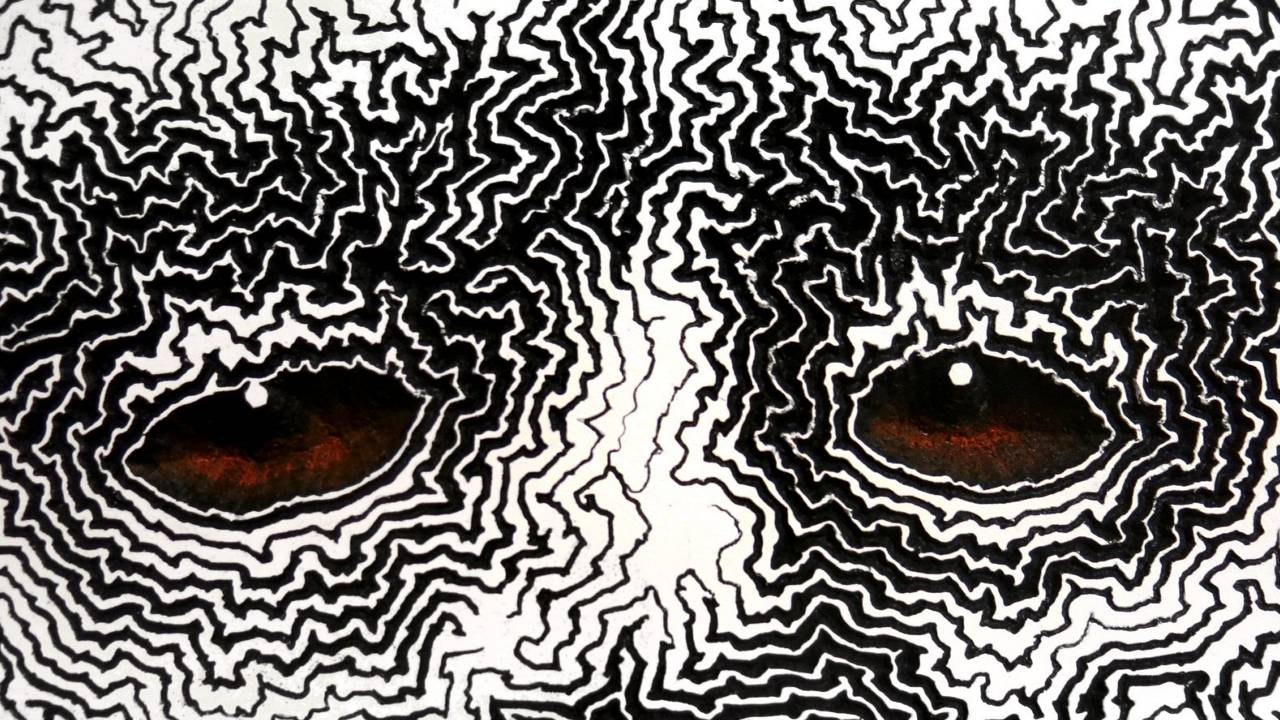
I took this gradient into my halftone program where I was able to derive contours and vary their width according to the image I painted. I used a simple radial gradient to create the lines in the background and then masked the two together. It was close to done but a couple parts were bothering me, so I took it back to Krita and zoomed in and started cleaning up. For example, I didn't like the sharp edge between the the background lines and the face, so I blended the transition in the halftone by painting tapered lines. Below is the edge between the hair and the background, with my painted version on the right.


One artifact of the algorithm is little dots that aren't connected to the contours. I knew this was going to eventually be CNC'd and any little dot means the machine has to stop, lift up, move over, drop down and drill the dot, stop, lift up, move over and drill the next... as opposed to just cranking through a continuous line. And CNC time is expensive! So I literally went through pixel by pixel and removed any little dots or other extraneous mark. As I was going through and cleaning everything up, I was also improving the look of the face at the same time. In the first example below from the forehead, you can see on the right that I have removed every little isolated island of black. In the second example, I changed the lines to help better define the teeth in the mouth. It's difficult sometimes to know what I'm doing when I'm zoomed in working on details, so I always have to keep zooming back out to make sure that the overall image is improving.


This finally resulted in the black and white digital master below (click to see a bigger version):

I've put in a ton of work by this point, but still don't really have anything tangible. That's the next step. From this digital master I am able to make various prints and engravings. Some of them are closer to reproductions, while others are closer to originals. The coolest thing I have made is this CNC engraving, and although it is theoretically possible to make another similar one I put so many hours into it that it feels like an original and I would not want to make another one unless I was doing something different. Anyways, I knew I wanted to do something like this after seeing some videos of CNC halftones on Youtube. I was looking for ways to get the highest contrast between the black and white, and I knew a physical shadow would be darker than any ink or paint by itself. I eventually got certified to use a CNC router and bought some bits and went at it.
Finally the engraving was finished, and I took it home. The areas which were not cut deep enough I cut by hand with a V-shaped chisel. Then I filled all the grooves with black Sumi ink. It's a deep rich black and it soaked right into the exposed wood but just sits on top of the resin laminate. Once it had dried I wiped the laminated white surface clean. About 90% of the ink wiped right off. The remaining 10% was an big struggle. The laminate is not perfect and has pits that collect the ink. So I had to carefully sand these away without breaking through to the wood. Also, some places had been cut too deep and there was no longer had any laminate left on the ridges. These were fixed by carefully applying white paint to the tops of the ridges with a brush or roller.

I then took vermillion Sumi ink and put that in the grooves of the background and the eyes. As I applied it, it mixed with the still wet black to create a nice warm brown. The vernillion was much harder to remove from the white for some reason, but luckily I did not need to go right to the edge with it

When I finally had all the white and black looking just how I wanted it, I finished it all off with a bunch of spray varnish and framed it. This piece has been sold, but if you would like to commission something similar, please contact me.
Thanks for reading! Here's a video with some of the final process: